|
1965 Mustang Gas Tank Restoration - DIYIn this article we'll cover 1965 Mustang gas tank restoration for a daily driver, but the procedure applies to all years of the classic pony car, from 1966 and up. Concours gas tank restoration (ie.show quality), is different from what follows and usually means using a new, properly stamped steel tank and is  covered in a different article.
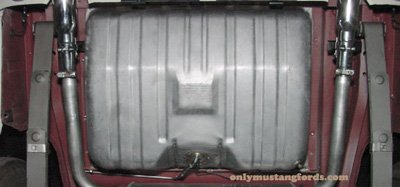
The finish should be natural, with the original US Steel stamp on it, regardless of whether your 1965 Ford Mustang was built in (T) Metuchen, New Jersey or (R)San Jose California or (F) Dearborn, Michigan. The stamp may not be available on the lower priced new restoration tanks and obviously only a concern if you are looking to enter your car for Concours judging.
Precautions and PreparationWhether you begin your 1965 Mustang gas tank restoration from the inside or the outside, really doesn't matter. What does matter, is safety first. Checklist Note: the purpose of the water rinse for the 1965 Mustang gas tank restoration, is simply to help remove remaining gas and flammable vapor from the tank prior to starting the gas tank restoration to ensure safety and reduce annoying fumes.
Exterior 1965 Mustang Gas Tank Restoration BasicsFortunately, there's not a great deal to do to get that old tank looking like new again and protect it from the elements. Unless your tank is au-natural and no paint or undercoat is covering it, you're going to need to first, remove the old finish and then refinish it with a tough, waterproof coating for long life. Most classic Mustang gas tanks, started life as unpainted metal, but over the course of time, were either repainted, undercoated, or covered with overspray from repaints over the years. If your tank isn't at all rusty and you just want to spruce it up and protect it, this do it yourself procedure will work fine, with one change which we'll discuss a bit later. If you want to paint or undercoat it again, the only difference in the procedure below, will be that for an undercoat job, you can skip using the finer sandpaper. Cleaning and Restoration Procedure
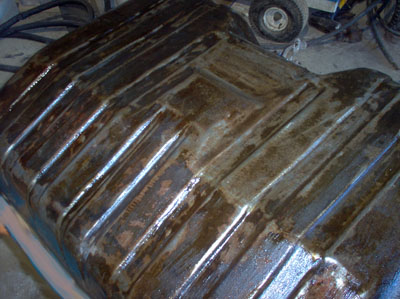
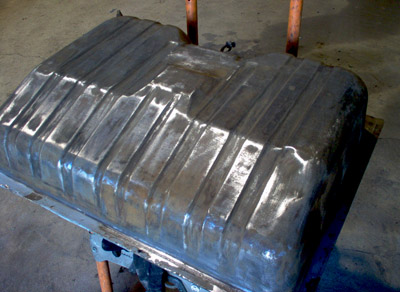
Begin your 1965 Mustang gas tank restoration by removing the old paint and crud. 
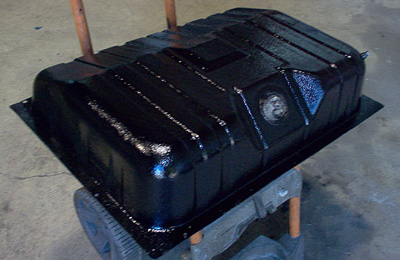
Sanding and Smoothing If the surface was mostly clean, use a scuff pad (available at most auto parts and paint stores) and scuff up the surface for refinishing. Rustproofing Whether you are planning on just a cleanup to a natural finish tank, or a good dose of paint or undercoating, you'll want to treat the tank to a couple of coats of spray on rustproofing paint. If you are looking for a clear surface, it's easy. Just pick up a can of the clear rust treatment, made by several manufacturers. Surface Prep If you plan to undercoat or use rock guard, not much preparation is necessary. Simply wipe the surface clean with a clean rag soaked in silicone, grease and tar remover, allow it to dry and spray on your rust treatment, followed by the undercoat.
Then, tape over any areas not requiring paint or undercoat and spray your surface. Interior Tank RestorationGetting to this point, I have to note that if you need to include the inside of the tank in your 1965 Mustang gas tank restoration, you may want to seriously consider just buying a new tank. With a 1965 Mustang gas tank cost in the neighborhood of about $130 for a brand new 1965 mustang gas tank, it may or may not be worth your time and materials to refurbish the inside of the tank. But if you do, it's pretty easy to do the job. With the filler neck removed and the tank sender and float removed from the back of the tank, blast out the inside of the tank with either compressed air, or a pressure washer, to remove any loose rust, scale from the old fuel or other contaminants. Pick up a can of liquid tank liner, which usually is some kind of epoxy formulation. Mix it up to the manufacturer's specs and pour the required amount into the tank. Cover or tape up the holes and rotate the tank until all sides and corners have been covered with a layer of the liquid material. Pour off any remaining mix and allow the inside of the tank to dry as directed. Final AssemblyDrive and Enjoy! knowing that you'll probably be the only person in the world that will appreciate your 1965 Mustang gas tank restoration (except for other fellow Ford Mustang owners) Wasn't that easy?
If you've decided to go with a new tank, check out the Part 13 - Mustang gas tank Installation section for complete details on how to remove and install a new gas tank, re-install the fuel gauge wiring, fuel sender and your Mustang's fuel neck tube. Return from 1965 Mustang gas tank restoration to Mustang restoration Part 1 - Mustang Restoration Part 2 -Resurfacing Minor Irregularities Part 3 - Rear quarter panel repairs Part 4 - Inner Fender Refinishing and Repair Part 5 - Mustang floor pan replacement Part 6 - Floor Pan Replacement Continued Part 7 - Headliner Replacement Part 8 - Mustang Dash Restoration Part 9 - Trunk rust repair Part 10 - Priming and Painting your Mustang Part-1 Part 11 - Gas Tank Restoration Part 12 - Color Sanding Part 13 - Mustang gas tank Installation Part 14 - Mustang gas tank Restoration Part 15 - Valve Cover Restoration Return to Ford Mustang
|


