|
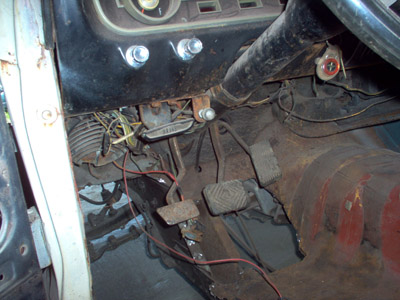
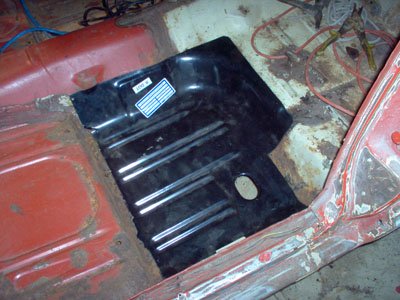
Part 6 Floor Pan Replacement1965 Mustang RestorationFloor pan replacement for this 1965 Mustang restoration, is one of the most common tasks faced by Classic Mustang owners and restorers. Classic Car RustIf you own any other classic muscle cars, you'll also know the drill. The Camaro, 55 Chevy, Chevelle, Charger and others all share the same fate at some time or other, a need for floor pan replacement. (And you thought the dealer installed undercoating was just an unnecessary profit taker)! My 1965 Mustang has fared better than many pony cars, but there's still floor pan replacement in it's immediate future. While replacing the floor pans is time consuming and isn't particularly fun, it's not all that difficult to do. If you can't do your own welding, or can't find a friend to attach the pieces, you can at least do the prep work and save some cash. Step 1. Assess the rust damageThe rust in my floors, showed up in two ways. The easy part, were a few obvious rust outs. The second ones showed up when I sand blasted parts of the toe panels from the wheel well area. This showed up many small pin holes on the driver's side panel and a few small ones on the front passenger side that I'd originally thought were rust free. (Oh well....) Step 2. Remove the rusted floor pans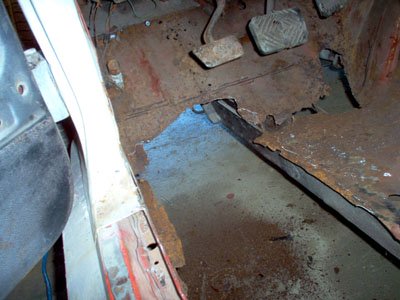
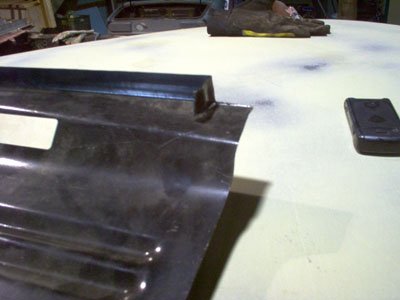
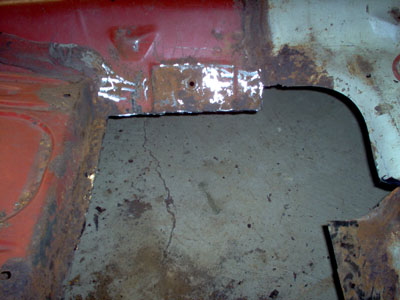
Just because you buy the sheetmetal floors as a unit, doesn't mean that you need to use all of them. For one thing, the replacement floors don't always fit like an OEM piece and you can still make a good looking floor pan replacement with a partial piece if you're careful. To complicate things, my 65 Mustang, had an ugly heavy gauge steel patch panel welded onto the driver's front floor area. underneath, was a chewed up, sharp edged mess, where the old metal had been removed. This resulted in some struggling to remove metal at the welds along the insides of the rockers. First came removing the patch panel and welds. Then came removing the jagged metal from the original floors and the lips still spot welded to the rockers. Warning: The driver's side toe panel near the gas pedal has the brake lines attached flush to it. So don't cut through without looking or you'll have a few more parts to be replaced! I decided to keep the good sheet metal between the transmission hump and the front crossmember for two reasons. The first, was because it kept the frame stiff with the old floors cut out. And secondly, because the original metal was in good shape and a heavier gauge than the panel replacing it. My seam will be directly on the frame rail flange, for an invisible fit and a very solid seam.
Seat PlatformsThe Seat platforms were in reasonably good shape, needing only a small patch on the forward edge. And floor pan replacement for the rear portion was a much simpler job. Rear floor pan removalAgain, it's a good idea to think about what goes and what stays. For a better appearance below the car, I chose to make the seams as high up the bend in the rear of the floor pan as possible. It's also the strongest part of that floor, with it's compound curve. And I did the opposite where the floor meets the transmission tunnel. In this area, I cut out the old floor below the machined bulge, where the seat belt backing plate is attached.
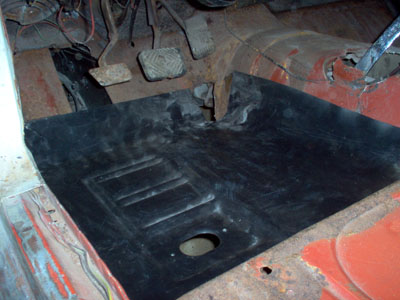
It also allows me to have a very solid welded area around the backing plate. Now it's time to test fit the floor pans. The old adage "measure twice, cut once" is sound advice.
Note: DO NOT use panel bonding adhesives. While it's fast, these floors are structural and panel bonding materials are for non structural pieces. When that's done, it's time to weld them in place and then apply a sealer to the floor pan replacement joints to keep moisture out and at the same time, blend the repaired area with the original floors. Next ... Part 7 Floor Pan Replacement Part 2The floor pan removal and replacement continues in Part 7
Restoration SectionsPart 1 - Mustang Restoration Index
|


